How Automated Fixtures work
The controllable properties of automated fixtures are often described as Attributes or Parameters. Even that old 1990 Leko has one controllable parameter: Intensity. We use the lighting console to send a signal to the fixture (or technically to the dimmer unit that the fixture is connected to) and that signal directs the lamp to burn at 100% or 60% or to fade to 0%. Therefore, Intensity is one of the most important controllable parameters in any lighting fixture.
In an automated fixture- Moving Light, LED fixture, and even non-lighting devices such as fog machines- there are additional controllable parameters that tell the fixtures to change elements other than intensity. These are known as Non-Intensity Parameters, often abbreviated NIP.
Non-Intensity parameters are organized into three general categories:
Additionally, each of these broad categories might have just a couple attributes, or dozens. A Warm White LED Profile fixture might have one channel of Color Control to adjust the color temperature, while a full color LED Profile moving light might have as many as 7 individual colors to control, as well as a color temperature wheel, a color wheel, pre-programmed color macros and more.
The following section will outline many of the different attributes that you may find in each of the different categories on different fixtures. When you're using automated fixtures, it's really important to pull out the manual of the make and model of your fixture and become familiar with what the light will do, even if you have a good operator who is going to do the actual programming.
In an automated fixture- Moving Light, LED fixture, and even non-lighting devices such as fog machines- there are additional controllable parameters that tell the fixtures to change elements other than intensity. These are known as Non-Intensity Parameters, often abbreviated NIP.
Non-Intensity parameters are organized into three general categories:
- Focus
- Color
- Beam (sometimes called Form)
Additionally, each of these broad categories might have just a couple attributes, or dozens. A Warm White LED Profile fixture might have one channel of Color Control to adjust the color temperature, while a full color LED Profile moving light might have as many as 7 individual colors to control, as well as a color temperature wheel, a color wheel, pre-programmed color macros and more.
The following section will outline many of the different attributes that you may find in each of the different categories on different fixtures. When you're using automated fixtures, it's really important to pull out the manual of the make and model of your fixture and become familiar with what the light will do, even if you have a good operator who is going to do the actual programming.
General Types of Automated Fixtures
There are several different general families of fixtures:
- Fixed-Focus Automated Fixtures: In most cases, we're talking about LED fixtures here. There are no Focus attributes, as these non-moving lights are focused similarly to conventional fixtures. During a focus session, an electrician physically points the light to a point on the stage, and the light stays there until it is refocused. These fixtures usually have Color parameters, and occasionally they will have Beam parameters, especially Zoom, and sometimes Edge.
- Wash Moving Light: Wash fixtures are moving lights that are primarily used for covering large areas of the stage with light. They have Focus and Color parameters, but usually are shorter on Beam parameters than the next couple of types. Zoom is a common effect, and some fixtures will have Edge functions. While it is relatively uncommon, some fixtures also have Framing Shutters or internal Barn Doors.
- Profile Moving Light: The defining fixture for Profile Moving Lights is usually the presence or absence of Framing Shutters. In most cases, if a fixture does have Framing Shutters, it is defined as a Profile unit, and if it does not, it is a Spot unit. The Profile fixture usually has at least one, sometimes two gobo wheels.
- Spot Moving Light: These fixtures may have more gobos than their Profile counterpart, because the space used for Framing Shutters in the Profile fixture may be used for additional gobo wheels. In most cases, the Profile and Spot fixtures are very similar, but have slightly different components inside. Spot usually has more gobos, but no framing shutters.
- Non-Lighting Devices: We also control devices that are not specifically lighting fixtures, especially fog machines and hazers. These devices also use Beam Parameters, usually labeled Volume and Fan. Most of these devices do not have Focus, Color, or even Intensity parameters, though some fog machines (especially in the world of DJ equipment) do have colored LED lights built in to color the fog.
Focus
The simplest of the Parameter categories is actually Focus. Focus attributes are basically your Pan and Tilt functions, and control where the automated fixture is pointed on the stage.
When you're designing with moving lights, the Focus function is usually the first set of attributes that you will want to adjust. An important rule of thumb is Tilt First, Pan Second. The reason for this is that the home position for many moving lights has the fixture pointing straight down (or up, in the case of a fixture sitting on the floor). If the head is pointed straight down and I adjust the Pan function, it just spins around without moving the beam. When you tilt first, even just a little bit, then when you pan, you'll be able to see the beam move on the stage.
- Pan: Left/Right rotation of the fixture
- Tilt: Up/Down rotation of the fixture
When you're designing with moving lights, the Focus function is usually the first set of attributes that you will want to adjust. An important rule of thumb is Tilt First, Pan Second. The reason for this is that the home position for many moving lights has the fixture pointing straight down (or up, in the case of a fixture sitting on the floor). If the head is pointed straight down and I adjust the Pan function, it just spins around without moving the beam. When you tilt first, even just a little bit, then when you pan, you'll be able to see the beam move on the stage.
Color
Color attributes are present both in LED fixtures, that create color through additive color mixing, and with white light fixtures which use dichroic glass flags to mix color in a subtractive matter. See the Color Theory page for further discussion of the difference between Additive and Subtractive color mixing.
Personalities
The concept of the automated fixture Personality involves more than Color, but because the most apparent differences are present in the color area, I think it is worth it to discuss this concept here. Personalities are essentially different modes in which fixtures can operate. Fixtures will often have one 'normal' personality that has fewer control attributes, and in turn uses fewer control addresses, and another 'extended' personality that gives the designer and programmer more specific control over the attributes, and uses more control addresses. For example, in the Color area, you might see these three personality options:
- RGB Mode- the designer or programmer mixes color through the use of Red, Green, and Blue encoders, and the fixture itself makes the calculations to control all of the LEDs to result in the correct color on stage.
- HSI Mode- the controllable attributes on the console are Hue, Saturation, and Intensity, and again the fixture makes additional calculations to tell the individual LEDs what to do.
- Direct Mode- In this case, the interface on the console has specific and direct control over each of the colored LEDs, so that you can 'tweak up the Indigo, just a little bit'. You have the most control here, but there are lots of things to keep track of, and it uses many more addresses in the system.
LED fixtures
Color-changing LED fixtures, whether they are fixed-focus or Moving Lights work similarly as far as a lighting designer is concerned. These fixtures have an array of colored LEDs instead of a traditional lamp, and are usually described with letters that relate to the different colors in the LED Array. The fixtures create color through additive color mixing. For example, in an RGB fixture, if we specify an amber color with the console, the fixture will be using mostly Red and Green LEDs, because mixing Red and Green in additive color mixing results in Amber.
Simple simple fixtures might be RGB (Red, Green, Blue). In theory, adding R G and B together mixes to white light. In reality, it's usually a pretty imperfect white light, and these RGB fixtures don't usually do a very good job presenting White light or Tints.
The next step, and perhaps the most common categories out there are 4 or 5 color arrays including RGB as well as some combination of A (Amber) and W (White). Some fixtures are RGBAW, while others are RGBW or RGBA. All of these will do a better job of creating tints.
Beyond these most common color LEDs, different manufacturers have added the results of their own color research to make more efficient color matching engines. Many of these fixtures include colors in the 'greenish' range such as M (Mint) or L (Lime). The ETC Source 4 LED has a 7-color array: RGBAWCI (including Cyan and Indigo).
In the case of these fixtures, the designer usually chooses a color on the console, either from a library of standard colors, a specialized library of colors that have been calibrated to mimic gel colors, or from a color wheel that shows Hue and Saturation. The console then sends a signal to each color address in the fixture
White Light Fixtures
|
Whereas LED fixtures with color arrays utilize additive color mixing, there are many Moving Light fixtures that continue to rely on subtractive color mixing model. Some of these fixtures are older fixtures that have a discharge lamp (an 'always on' arc lamp), but many use white LEDs as the source. White LEDs remain brighter than colored LEDs, so many of the high-powered moving lights of today use a white light LED engine, and dichroic filters and flags to change the color of the beam.
The first way that these fixtures change color is through the use of a color wheel. The color wheel is built into the fixture, and has several cells, each of which have a dichroic glass filter installed. If the fixture only has a color wheel, the colors that you will be able to use will be limited by the number of cells in the wheel. Each fixture ships with a standard set of color filters. In many cases you can change out the color filters in the wheel, although this is an expensive process, especially if you have a lot of moving lights, and I have seen custom color wheels only rarely, especially in an academic and non-profit production setting. The second manner of color changing for white-light fixtures is by use of gradient flags. These are (usually) 3 wheels that are installed inside the body of the moving light that have a gradient of a hue. When the wheel is in it's 0% position, the flag is transparent, and then as the level of the flag increases, the saturation of the hue moves evenly to 100% saturation. In most cases these three wheels are CYM (Cyan/Yellow/Magenta), which are the secondary colors of light. Similarly to Additive LED color engines, all the designer or programmer needs to do is to specify a color on the console, and then the fixture and the console send the proper signals to set the flags at the correct position to create that color on stage. It is also common to have a gradient flag with CTO (Color Temperature Orange). Because the white light is typically an extremely high color temperature in the 6000°K to 7000°K range, the light often appears unnaturally harsh, especially for plays with a realistic environment. Remember that for all the years that we've been using halogen lamps, the color temperature of "white" light has been in the 3000°K range, which is a very comfortable range that makes faces look good. We often have a desire to 'warm up' the white light, without changing the Hue. This is where CTO comes in. This is a color temperature gradient flag which can adjust the color temperature anywhere from 0% CTO (where you'll see the 'native' color temperature of the lamp) to 100% CTO (which pushes the color on stage closer to 2500°K or 3000°K). Remember, higher Color Temperatures are 'cooler' and look 'bluer'. Lower color temperatures are 'warmer' and look 'yellower'. |
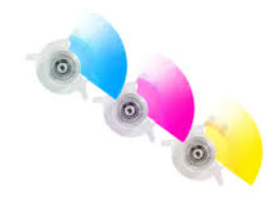
These are examples of CYM Gradient Flags
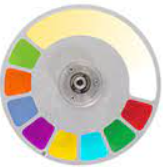
This color wheel actually has a CTO gradient built in.
|
Beam
Beam Parameters involve any attributes that adjust the size, shape, or appearance of the beam of light. Beam parameters are where the most variance from fixture to fixture exists. There are so many different beam parameters that it would be impossible in this introductory look at Automated Fixtures to cover all of them, but I will try my best to hit as many of the common ones as possible. Some console manufacturers even split the Beam category into multiple sub-categories (such as Form and Image, in the case of ETC Eos).
This is where I tell you to dig into the manual of whatever Moving Light fixture that you have and see what is available to you and experiment with them.
This is where I tell you to dig into the manual of whatever Moving Light fixture that you have and see what is available to you and experiment with them.
Basic Functions
While not all moving lights will even have all of these basic functions, here are a few of the most common Beam Parameters:
- Edge: This is similar to 'running the barrel' on a fixed-focus profile fixture, or the difference between a Fresnel Wash unit and a sharp-edged ERS fixture. If your Moving Light has an Edge function, you can make the beam sharp or fuzzy. This is probably the most common Beam parameter on a moving light. If you have a gobo active, the Edge function makes the gobo sharp or soft.
- Zoom: An Optical Zoom feature allows you to adjust the lenses inside the fixture to change the Beam Angle of the fixture. This is equivalent to changing from (for example) a 50° barrel to a 19° barrel in a fixed-focus Profile fixture. Similar to these fixtures, if you make the Beam Angle bigger, the light on stage gets dimmer because you are spreading the same amount of light over a larger area.
- Gobo: Moving Lights come in three different general categories: Wash, Profile, and Spot. Wash units will not have Gobos, but most Spot and Profile fixtures do. Gobos typically work similarly to the color wheel described above, but with glass or metal gobos instead of dichroic color filters. Fixtures usually have somewhere between 5 and 10 gobo slots per gobo wheel. Sometimes these gobos can rotate, and other times they are fixed in place. Fixtures may have 1, 2, or even 3 separate gobo wheels. In fixtures that have more than one gobo wheel, it is common that one wheel has fixed gobos and another has rotating/indexing gobos.
- Rotate/Index: If a gobo has the ability to rotate, the fixture usually has the ability to be in one of two modes. Index mode allows the programmer to assign an orientation to the gobo. Imagine a gobo that is a series of stripes. The programmer could use the index command to make the stripes be oriented vertically or horizontally on the stage. In Rotate mode, the gobo would turn continuously in either direction at a speed specified by the programmer.
- Shutter (or Shutter Strobe): All fixtures with an 'always on' discharge lamp will have a physical shutter that closes off the optical path so that the light can black out. The shutter is also used to create strobe effects, and exists in many fixtures that are not discharge lamp based. In some LED fixtures, you may find Shutter parameters for strobe effects, even if the fixture does not have a physical dowser built into the optical path. Shutter and Intensity parameters are different attributes on separate channels, so it is possible to have your Intensity set at full, but see no light on stage because the Shutter parameter is closed.
- Iris: Another method (along with zoom) of making the beam larger or smaller. This is an adjustable physical aperture that can close down the size of the beam. Unlike the Zoom function, the Iris doesn't do anything to the lenses, and so the intensity will be the same for a small field of light as it would be for a large beam. The iris simply blocks some of the field. You can think of it as an adjustable circle gobo.
- Animation Wheel: Like a fancy gobo, an animation wheel has an abstract pattern that continuously rotates. This is a good feature to create rippling water effects, and is often used in combination with another gobo.
- Prism: Perhaps more accurately described as a kaleidoscope, this faceted lens breaks the beam of light into multiple parts. A 3-facet prism will give you three circles, a 5-facet becomes five, etc. The prism can often rotate as well, and when used in combination with rotating gobos, can create a really intense psychedelic effect. I have also sometimes used the Prism (with a way-out-of-focus Edge setting) to make the light field bigger than it usually is, especially with fixtures that do not have a Zoom attribute. One caution is that you're splitting the available light over a larger area, so it will be dimmer than when you are not using the Prism.
- Framing Shutters: We saw "Shutter" before, and this becomes a little confusing. These shutters are more analogous to the shutters on Profile fixed-focus fixtures. The metal blade is able to shape the beam of light by cutting off a side of the beam. Usually each frame has two parameters: Angle and Thrust. First you will 'push in' the shutter with the Thrust parameter, and then you can rotate the shutter by adjusting the Angle. In some fixtures, you can adjust the angle of each shutter individually, but in others you can only rotate the whole frame assembly together. In this second type of fixture, you will always have 2 sets of 2 parallel shutter blades, but you will be able to rotate the whole set together to get the best angle.
- Frost: This is another feature that is similar to a previously discussed parameter. Similar to conventional fixed-focus profile fixtures, there are multiple ways to get similar results with your light field. In a conventional fixture, I can 'run the barrel' to soften the edge, but I can also use a Frost gel in the color frame to soften the beam in a slightly different manner. The same is true for Moving Lights- as suggested earlier, the Edge parameter adjusts the focal relationship of the lenses to soften the beam of light, and Frost is a physical filter that is inserted into the optical path to adjust the light field in a different way.
- Shake: On a few moving lights, especially those that are designed for DJ applications (but some pro lighting versions as well), you may find a Shake feature that bumps the angle slightly back and forth to create a jittery effect on stage. This feature usually happens inside the optical path in the fixture rather than working with the pan and tilt parameters to physically move the fixture.
